Mistakes That Could Ruin Your Chocolate-Covered Strawberries
We may receive a commission on purchases made from links.
Chocolate-covered strawberries are a decadent treat. Whether you're planning on making the chocolatey treats as a symbol of love on Valentine's Day or are just looking for a tasty dessert to pair with a sweet wine, you can't go wrong with chocolate-covered strawberries. When prepared properly, the combination of the crunchy chocolate, soft and juicy strawberry, and the melding of the two flavors is simply divine. But that's when they're made to perfection. Unfortunately, there's no guarantee your chocolate-covered strawberries are going to turn out with that ideal taste and texture you're hoping for.
And so, you might have guessed there are many mistakes home chefs encounter when trying to make their own chocolate-covered strawberries. These mistakes can cause the dessert to turn out soggy, result in the chocolate not fully covering each strawberry (or sliding right off of them), or leave your strawberries looking sloppy, just to name a few of the potential problems that can ruin your chocolate-covered strawberries. Learning more about what not to do — and what you should do instead — can help you avert a crisis and create a restaurant-worthy treat to share with that special person (or to simply enjoy on your own).
Not choosing fresh and flavorful strawberries
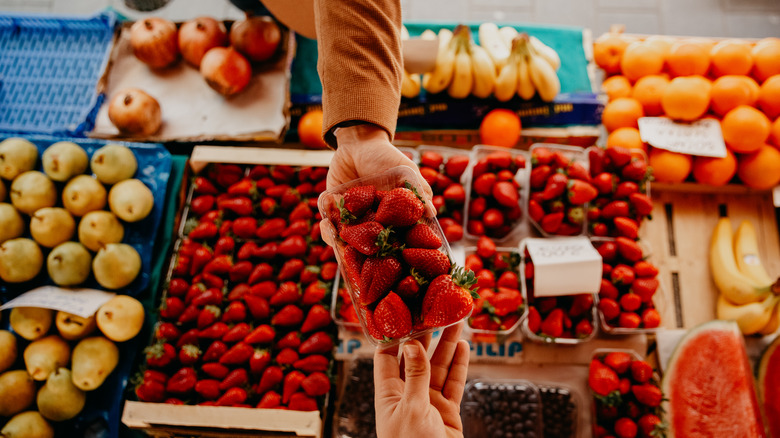
If you don't start with fresh, flavorful, and juicy strawberries, then you're setting your chocolate-covered strawberries up for failure. Old or unripe strawberries simply won't taste good, no matter how much you dress them up. So, take your time at the grocery store or farmers market and make sure you know what you're looking for. Strawberries should have a little shine and a bright red color. When it comes to flavor, a smaller strawberry will almost always be superior to its larger counterpart. Good strawberries should smell like strawberries. So, take a whiff of each container and only choose those with that sweet and fragrant aroma.
If you can find them, opt for Oregon berries — you won't be disappointed by their sweet taste. However, if you're making a Valentine's treat, these probably won't be in season, so you'll have to pay even closer attention to the look and smell of each strawberry package. Be sure to look out for any warning signs that the fresh produce you're picking isn't good. For example, stay away from strawberries that are bruised or have too much white around the stem.
Remember, you're going to be dipping these strawberries in chocolate. If possible, choose ones that have good, solid stems. It will simplify the task of getting them evenly covered with chocolate when you get to that step. The stem color and appearance can also clue you into the freshness of the berries themselves. Opt for strawberries with a bright green stem that doesn't look sad or droopy.
Using cold strawberries
Unless you're ready to immediately start preparing the chocolate-covered strawberries when you get home from the grocery store, you're probably going to put the berries in the fridge to keep them fresh. And, while this is a good way to store the strawberries to keep them from spoiling, you will want to leave some extra time to let them warm up a bit when you're ready to start making the dessert. Strawberries are almost entirely made of water (about 90%). As they warm up, they begin to sweat. Think about the condensation on the outside of a glass of water on a warm day.
If the strawberries start sweating after you've dipped them in chocolate, you can probably imagine the problem it can create. As the water drips off the berries, it will soften and melt some of the chocolate, leaving you with a mushy mess. To avoid this issue, all you need to do is remove the strawberries from the fridge about 30 minutes before you're ready to start working. This will help them come to room temperature, ensuring the chocolate stays hard and crisp once they're dipped.
Not drying the strawberries fully after washing them
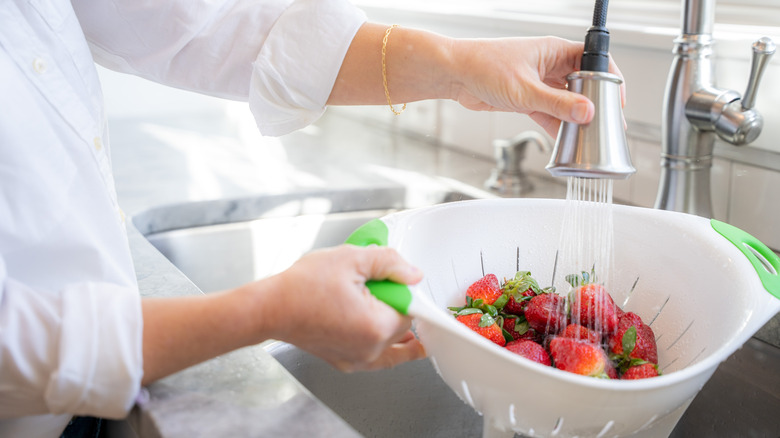
Just as the sweat from berries that start off too cold can ruin your chocolate-covered strawberries, so too can leaving the berries too moist after washing them. Wet berries will prevent the chocolate from hardening properly, leaving it soft and mushy. While you can't skip the step of washing the berries, you must be sure to leave sufficient time for them to dry out before you start dipping them in chocolate.
Before you wash the berries, lay out some paper towels or a dish towel on your counter. Rinse each strawberry and place it on the towel, leaving space between each one to allow air to flow. Let the berries sit for several minutes. Once you're ready to start working, make sure they are completely dry by gently patting them with a clean and dry paper towel.
Failing to melt the chocolate properly
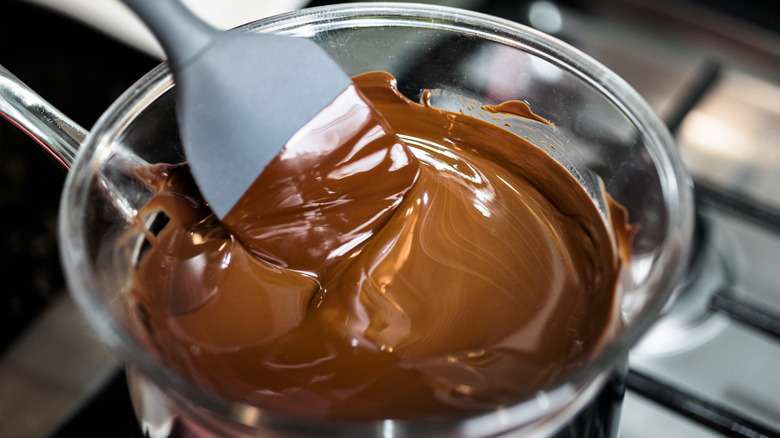
A caramel apple would be nothing without perfectly melted caramel. The same is true for chocolate-covered strawberries. If the chocolate seizes or isn't smooth and creamy when you melt it, it isn't going to provide that perfectly smooth coating for each strawberry. One key is starting with the best type of chocolate. Consider trying baking chocolate, milk chocolate chips, or semi-sweet chocolate chips.
Next, you must choose the right method for melting the chocolate. There are a few options that can work, including using a double broiler or melting the chocolate in the microwave. If you don't have a double broiler, you can still use this technique by filling a saucepan about a quarter of the way with water and bringing it to a boil on the stove. Then, place a heat-safe glass bowl on top of the pot (it should be large enough to sit on top without dropping in). Add your chocolate to the bowl, turn the heat all the way down, and stir the chocolate constantly. The constant stirring is key if you want to ensure the chocolate comes out nice and smooth. After the chocolate is smooth and melted, you can temper it by stirring in a few unmelted chocolate chips (they'll melt quickly with the heat).
If you want to use the microwave to melt your chocolate, you'll also need to stir it frequently. Put the chocolate in a microwave-safe bowl and heat it for no more than 30 seconds at a time before removing it to stir.
Choosing the wrong dish for dipping
Many people assume that any dish or bowl will work when making chocolate-covered strawberries. However, this is a false assumption and the reason some strawberries don't turn out as expected. There are a few things to look for when choosing the perfect dish for dipping. First, it must be deep enough to ensure you're able to fully cover each strawberry with chocolate. If it's too shallow, the chocolate won't reach all the way up to the stem.
The width of the bowl is equally important to its depth. If you choose something too wide, you'll find that you need more chocolate to cover all of your strawberries, and you'll be left with a lot of waste at the end of the process. Strawberries aren't very wide, so look for a dish or small bowl that is only a few inches wide and deep enough to adequately fit and cover each berry. If you have a smaller mason jar or a 1- or ½-cup measuring cup, that may work perfectly.
Failing to cover enough of each strawberry with chocolate
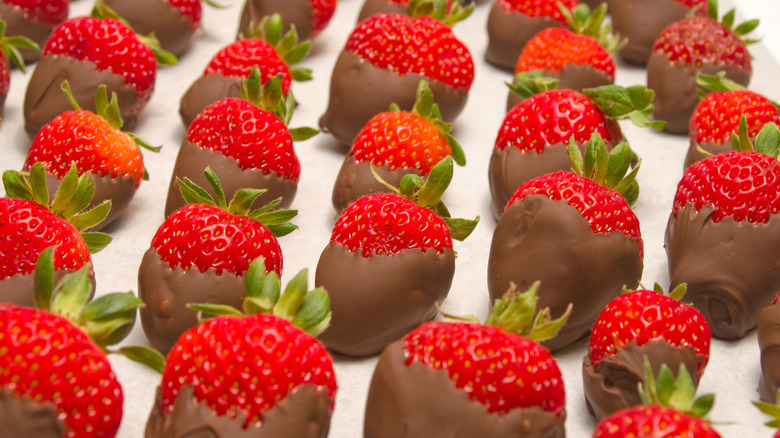
They're called chocolate-covered strawberries for a reason. The entire berry (or at least most of the berry) is supposed to be covered with chocolate. So, if you only dip the tip, or even just the bottom half in chocolate, then you're making a mistake that might disappoint those you plan to share the treats with. While this sounds basic in theory, many people fail in properly executing this goal.
The obstacle that often stands in the way of adequately covering each strawberry is the stem. If the stems are too short or too weak, then you may find yourself holding the top of the strawberry with your fingers. Obviously, if your fingers are on part of the flesh of the berry, then it is going to prevent you from fully covering it with chocolate. To get around this problem, carefully pierce the top of each berry with a few toothpicks or a skewer to help you hold them as you dip them in the chocolate. Once you're finished dipping, you can remove the toothpicks and enjoy the satisfaction of your fully-coated strawberries.
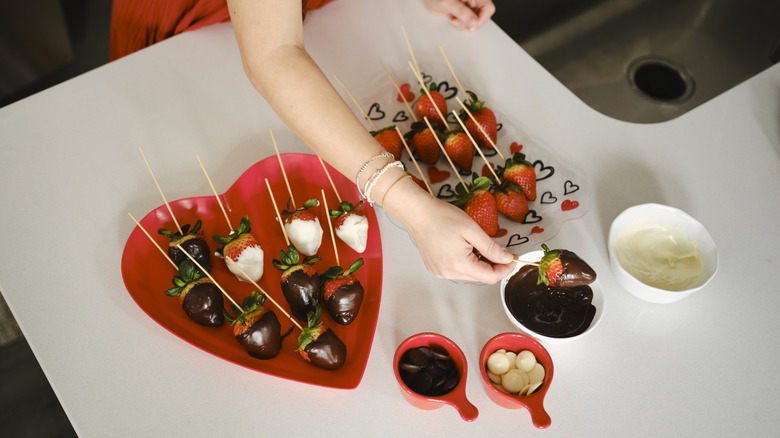
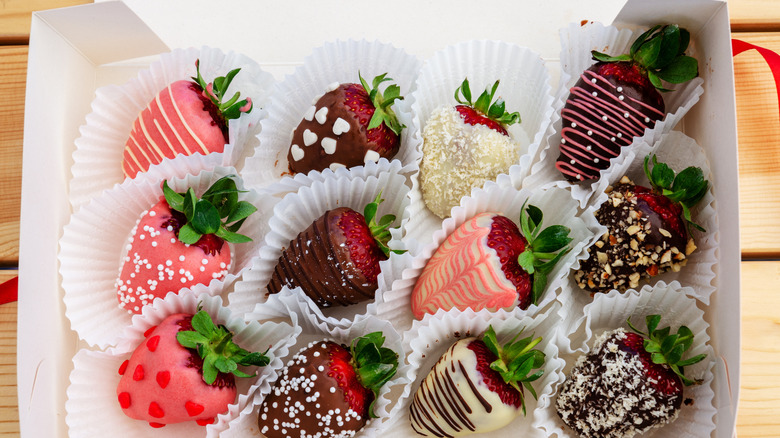
Waiting too long to cover the chocolate with any desired toppings
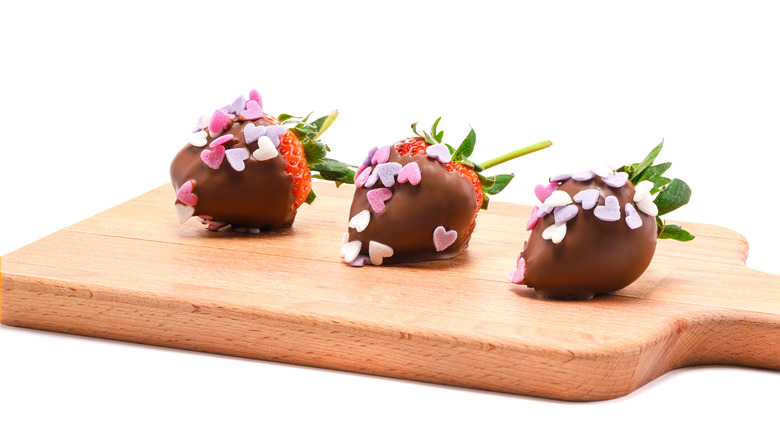
Chocolate-covered strawberries technically only require two ingredients: strawberries and chocolate. However, you may want to fancy them up with additional toppings, such as sprinkles or mini chocolate chips. The key is to add these toppings at the right time. Otherwise, they won't stick to the berries and will simply slide right off when they are picked up.
It is essential to add any toppings to chocolate-covered strawberries before the chocolate has a chance to set. Because the chocolate hardens relatively quickly, you should have all of your toppings ready before you start dipping the strawberries and add them as soon as you have finished dipping. If you're making a large batch of strawberries, you might even pause in the middle of dipping some of them to add the toppings to those that are already covered in chocolate.
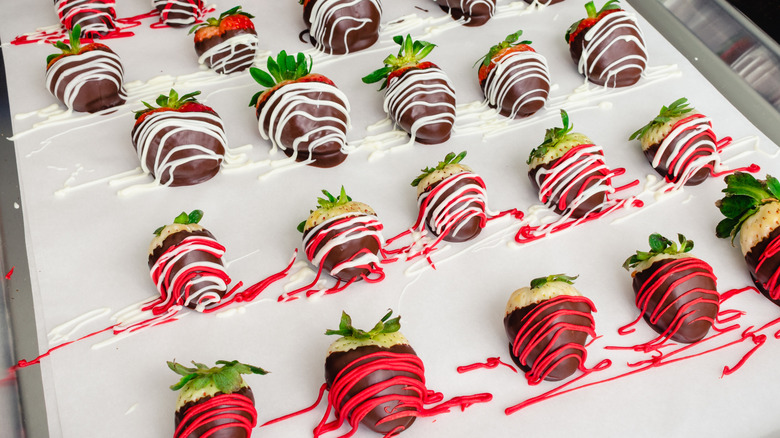
Not using the right type of piping bag
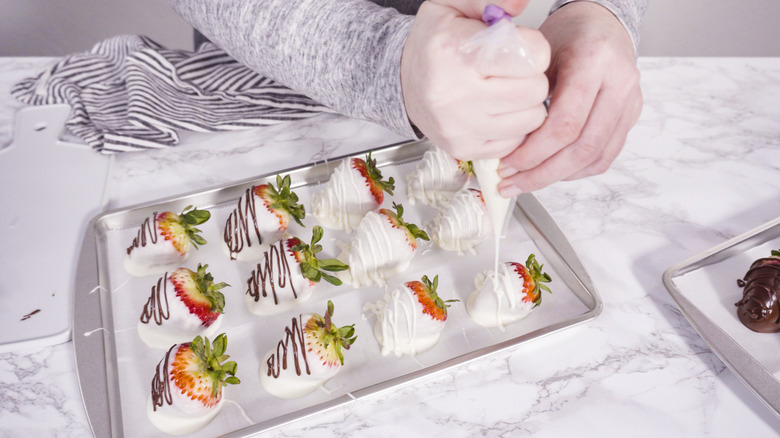
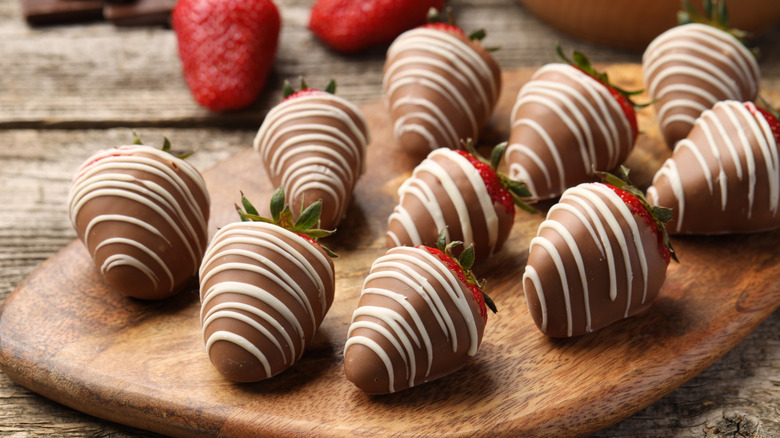
Instead of (or in addition to) adding toppings to your chocolate-covered strawberries, you may also decorate the berries with a drizzle of white or dark chocolate — this can enhance their appearance and decadent flavor. However, if done incorrectly, it can make the berries look sloppy. If the melted chocolate doesn't come out of the bag properly, it may clump or create an overly-thick line — and this can ruin the look of your chocolate-covered strawberries.
The key to avoiding this problem is to use the right piping bag, instead of relying on a DIY method like snipping the corner off a sandwich bag. Piping bags, such as these that come with a fine tip, can help you decorate each strawberry neatly and precisely. No more clumps or messes, just smooth, clean, and beautifully-drizzled lines.
Forgetting to use parchment or wax paper
Picture this: You worked so carefully to melt the chocolate, dip the berries in it, and decorate them neatly with toppings and melted chocolate drizzles. The time has finally arrived to enjoy the (chocolate-covered) fruits of your labor, so you pick up one of the strawberries off the serving platter. Instead of coming off neatly, the chocolate cracks, the strawberry pops out, and you're left holding a plain strawberry with a few flecks of hard chocolate stuck to it.
This situation can be avoided if you line the platter or sheet pan you're using with some parchment paper or wax paper. Doing so will prevent the chocolate from getting stuck to your serving dish, ensuring that each strawberry lifts off cleanly — with all the chocolatey goodness still covering it. Then you can easily transfer the strawberries to a fancier platter, serving dish, or a gift box.
Trying to serve the chocolate-covered strawberries immediately
Chocolate strawberries are a labor of love. And, after putting all that hard work into making them, you probably want to immediately share these sweet treats with the person you're preparing them for (and enjoy the little tasty reward for all of your efforts as well). However, chocolate-covered strawberries should not be served immediately after they're made. If you serve them too quickly, the chocolate-coating will still be a bit wet. It could drip on the person biting into it and certainly won't deliver that classic crunch you want to hear as you eat a chocolate-covered strawberry.
Fortunately, you won't have to be patient for too long. Unlike other recipes that need to chill for several hours, chocolate-covered strawberries only need between 15 and 30 minutes to set. To help them properly do so, put them in the refrigerator after you've finished coating them — and soon they'll be ready to enjoy.
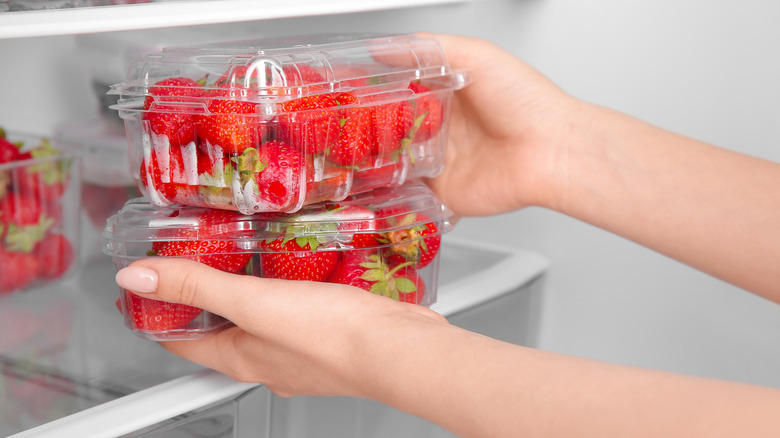
Not knowing how to properly store the strawberries
One of the biggest blunders people make is not knowing the best way to store chocolate-covered strawberries. Ideally, you won't need to store any of these treats, as they will have the best taste and texture on the same day they're prepared. After initially chilling the strawberries to let the chocolate coating set, remove them from the refrigerator — remember the berries will start to sweat if they get too cold.
If you don't eat all of the berries right away, they will be best stored on the counter for up to one day. Both strawberries and chocolate can safely be left at room temperature for short periods of time. If you don't finish the strawberries within 24 hours after you made them, you will want to move them to the refrigerator to keep them from spoiling. The berries won't last forever, so aim to eat them within two days. To prevent them from getting soggy as the berries sweat, store in an airtight container lined with a few paper towels. If you have several strawberries left, don't just pile them all together. They should be kept in a single layer — either in separate containers or with a piece of parchment paper and some additional paper towels between the layers.
Letting the leftover chocolate go to waste

After you've finished coating each strawberry, it is likely that you will have some leftover chocolate. Whether you misjudged and you have about a cup leftover or there are only a few tablespoons of melted chocolate left in the bowl, you don't want to let it go to waste. Chocolate is chocolate, after all, and you can certainly find a delicious way to put it to good use. Of course, you could always let it set and snack on it like a candy bar — or even use a spoon to clean up any evidence of excess chocolate before it even has a chance to set — but there are several other options to consider.
While the chocolate is still warm and melty, why not make other chocolate-dipped treats. Check your pantry, and pull out some pretzels, cookies, popcorn or even potato chips. Follow the same steps you used to coat the strawberries, making sure to set each item on a piece of parchment paper to let the chocolate set.
If you don't have an immediate use for the chocolate, but can't stand to see it go to waste, refrigerate it for later use. Pour it out of the bowl onto a sheet of parchment paper and let it set. Once set, you can peel it from the paper and store it in an airtight zippered bag or container. Keep the chocolate in the fridge for up to two or three months until you have a new use for it — or until your sweet tooth strikes and you need a little snack.